Skip to content

Problem
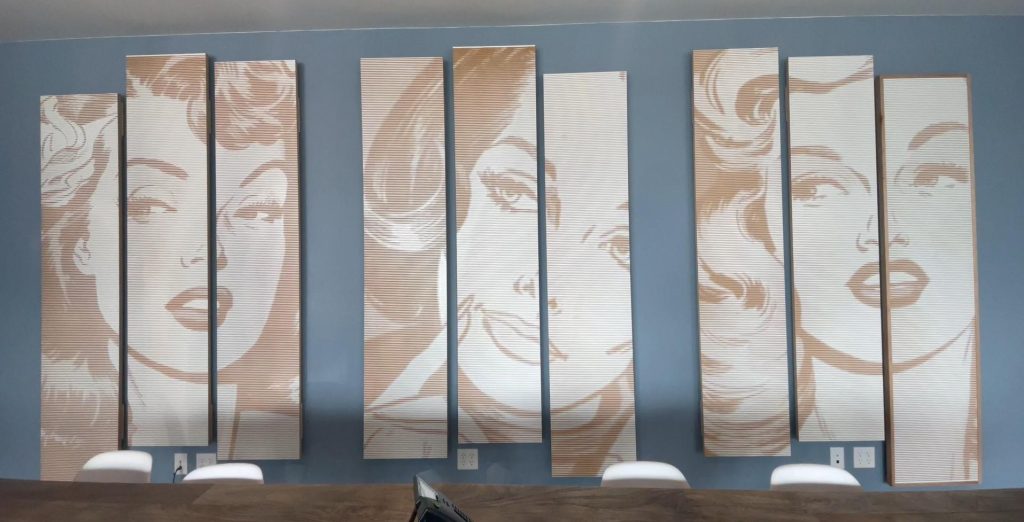
A boardroom with a severe echo and loads of bland wall space
Solution Criteria
- Provide sound deadening
- Be artistic and fun
- Not take up too much space
- Be simple to process and mount
- Not obstruct electrical outlets
Idea
Create artistic panels mounted with a stand off from the wall
- Selected MDF as material for its uniform composition that makes for smooth cutting on the FROGMill™
- Picked comic type artwork that’s fun and fits the theme of the space
- Staggered the upper and lower dimensions while maintaining the alignment of the artwork to give the panels an extra punch of style
Process
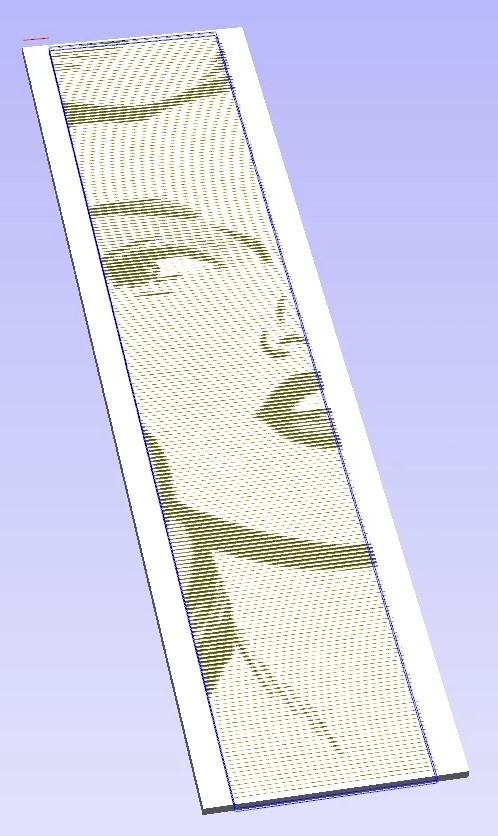
Design – Using the criteria above, we found the appropriate artwork and sliced each picture into three panel sections and exported the sections for tooling

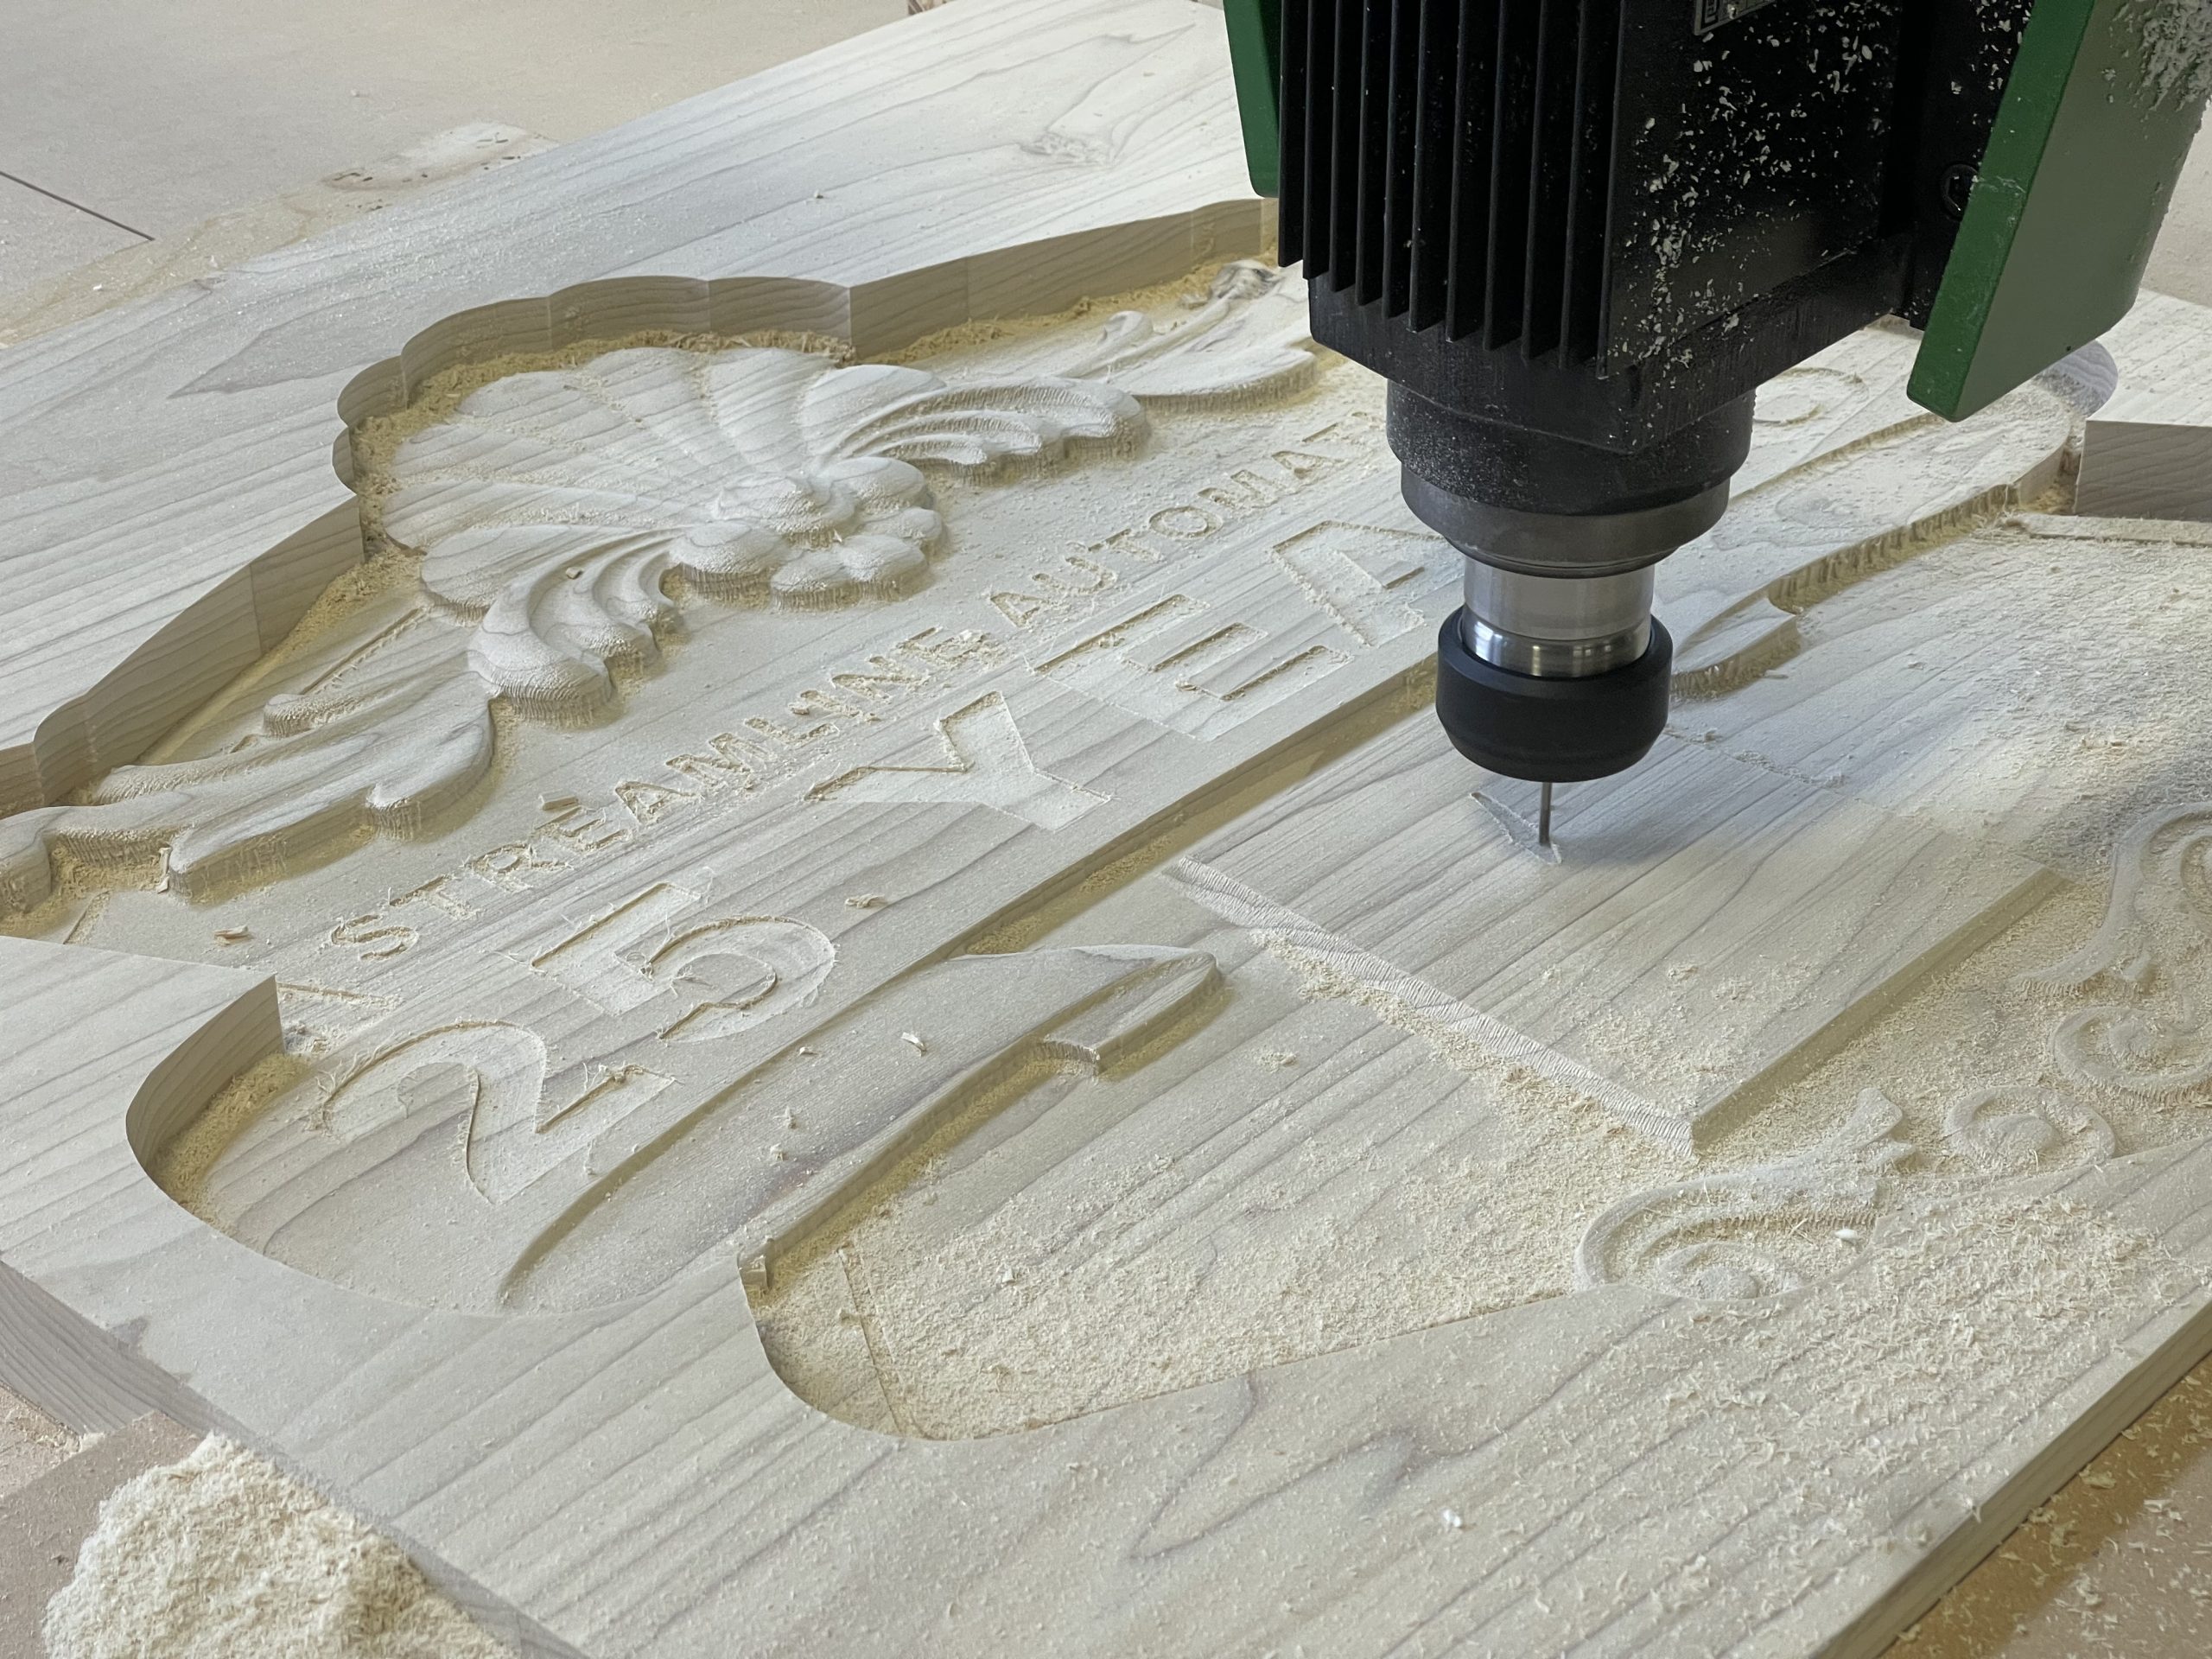
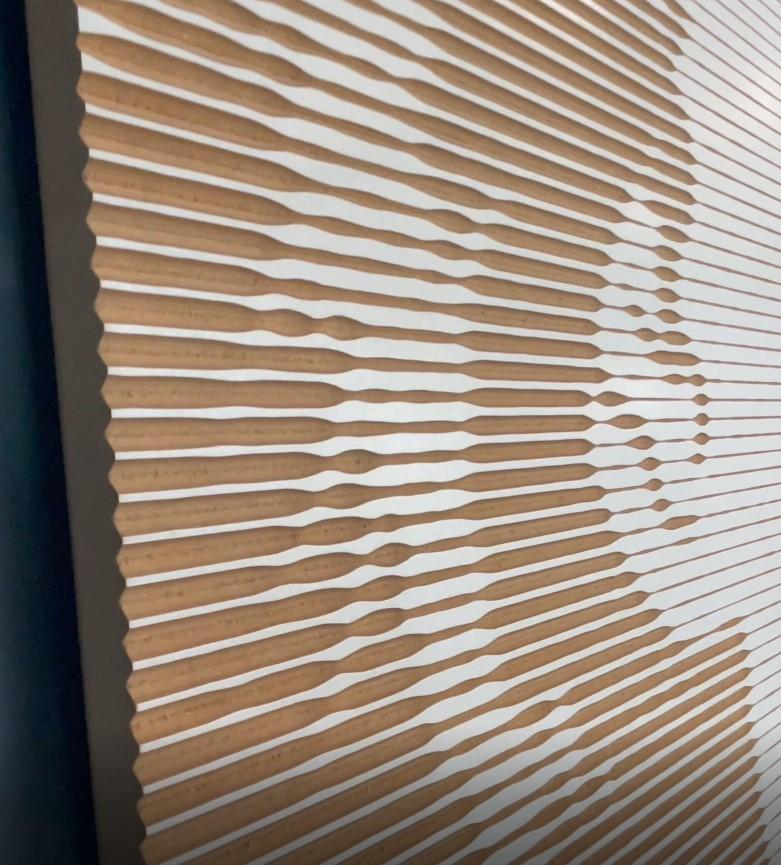
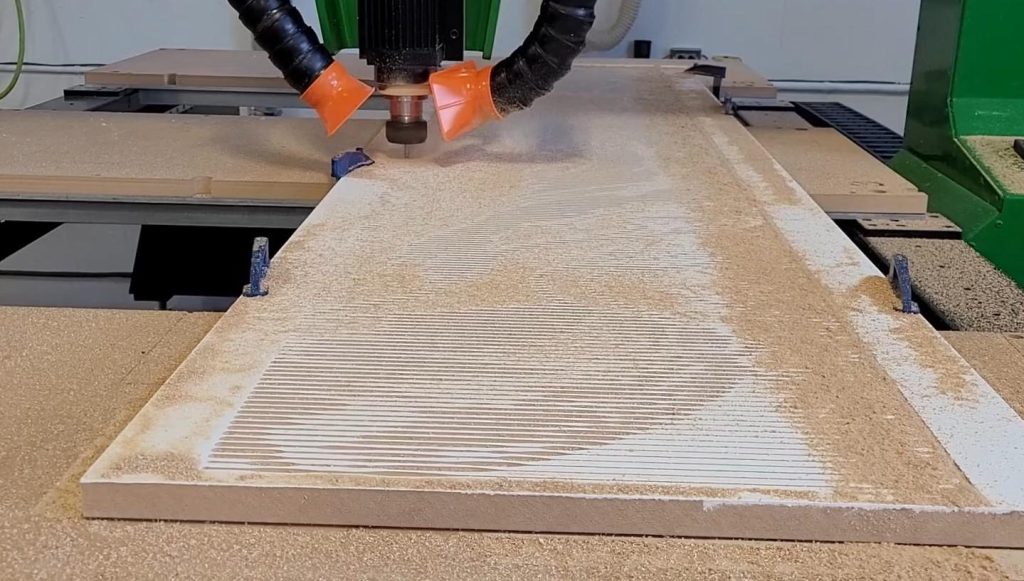
Tool pathing – Vectric Aspire (Aspire) has a handy tool that automatically creates a V-Groove toolpath using variables for maximum cut depth, line spacing, and angle. The darker areas are cut deeper and the V-Groove tool makes the lines wider the deeper it plunges. After the Photo V-Carve toolpath, a profile toolpath is set to cut the outer dimensions of the panels to remove the cut panel from the full sheet of material. Aspire includes powerful feed rate and chipload calculation tools, making the process straightforward, regardless of the material.
Manufacturing – Designs completed, toolpaths generated, material ordered, next the files are supplied to the machine operator and the preparation work begins. In this case, a clean white surface was achieved with white paint rolled onto the panels before machining. This gave a two-tone effect, where the cuts reveal the material under the paint, leaving a stark contrast between the cut and non-cut areas of the artwork. After drying, the panels were put onto the FROGMill™ and the cut file was loaded, one file per panel. Two tools were used for each panel – the 90-degree V-Bit for the engravings, and a .25” compression bit for the profile pass. Each panel took under an hour to complete, so the machining was completed in just over a single shift. The next step was to clean out the cuts and remove any dust from machining before applying a clear coat to all the panels with a spray gun. The clear coat sealed the machined surface where the paint was cut away, gave an even glossy surface, and allowed the panels to be wiped down and kept clean without damaging them.
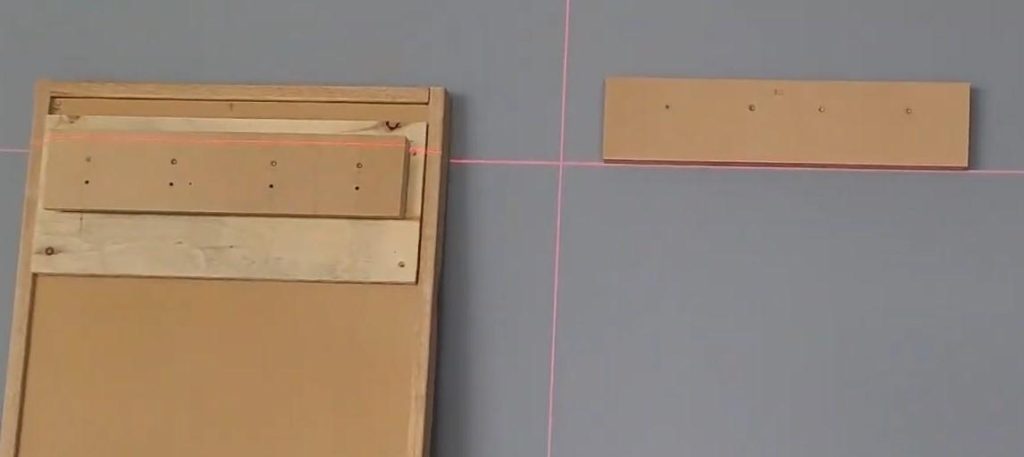
To maintain a simple installation process and ensure the artwork stayed aligned once it was mounted, all the panels were made at full height during the machining process, leaving a constant point for measurements. Before trimming the upper and lower sections of the panels to give the staggered look, measurements were taken from the tops of the panels and cleats installed so the panels were all at the same height in relation to the artwork. Once the cleats were installed, the panels were trimmed in accordance with the mounting strategy.
Installation – To keep the panels easy to install, even with the tops and bottoms staggered in the artwork, the mounting cleats were all at a constant position. A straight line was drawn across the wall with a level laser to measure the spacing, translate the hole locations from the cleats, and secure the cleats to the wall. A total of nine cleats were installed and the completed panels placed on the cleats. This ensures the panels are easy to remove, rearrange, or replace with new artwork.
Outcome – The panels look fantastic in the space and provide substantial sound deadening. The large scale delivered an impressive, high-impact installation that was relatively quick and inexpensive to produce. The automated toolpath generation in Aspire makes this a very simple process, regardless of the images you select. Since adjusting toolpath variables alters the level of clarity in the image, there’s endless flexibility to design and create.