Skip to content

Idea
To use a repeatable pattern, and a simple-to-produce paint technique, in order to create an attractive décor for our office.
Design process
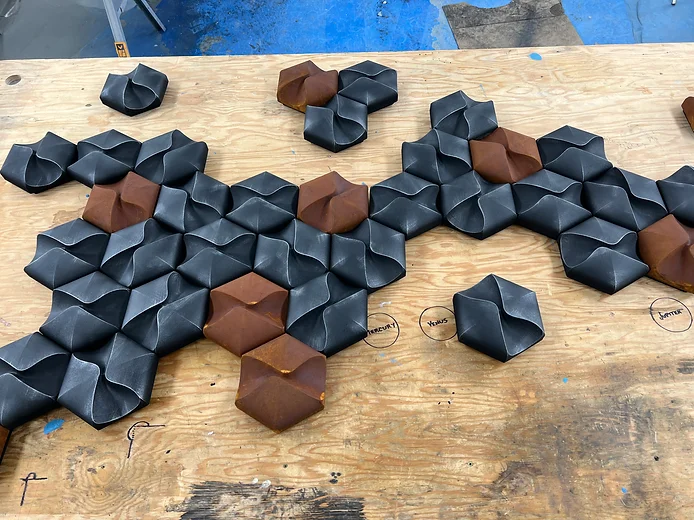
Using Fusion360, we were able to create the shape and see how it would look in a repeated pattern. We were able to make small changes to the surfaces in order to get what we were going for – an extruded hexagonal shape, with a concave recess. We thought the mix of symmetry, hard lines, and organic surfaces would suit our space well.
Machining
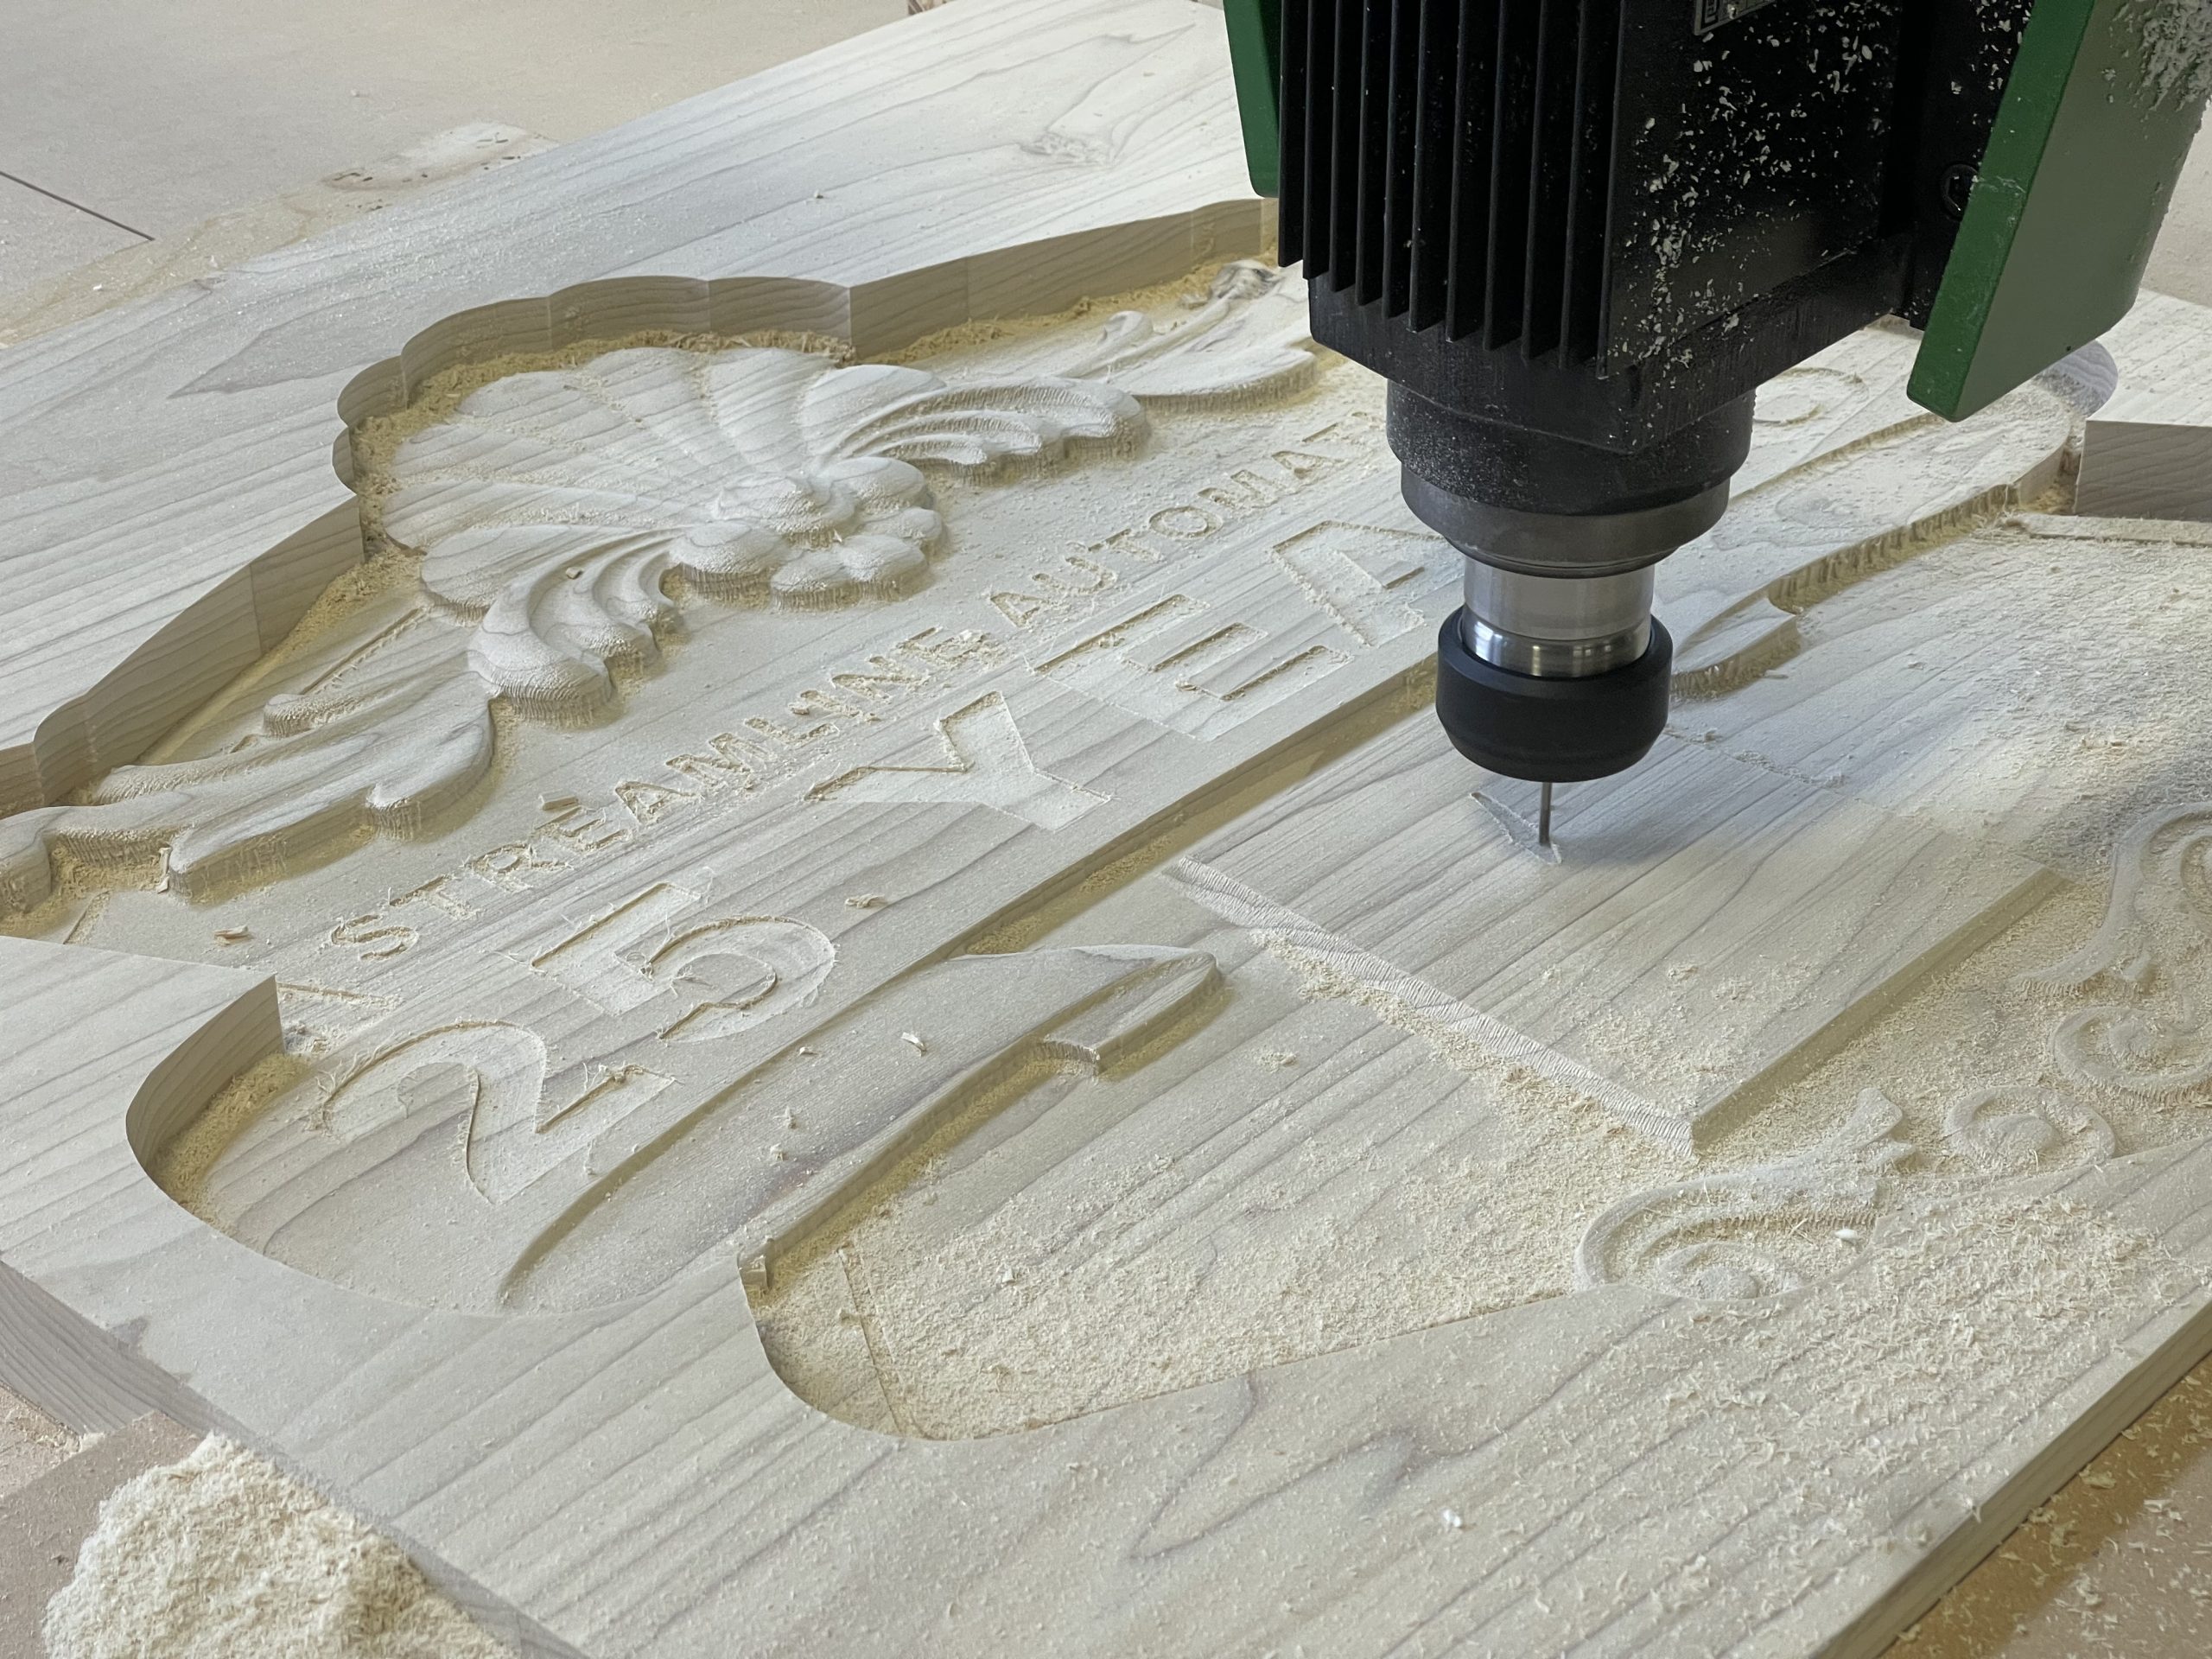
Though the entirety of the design is made up of many parts, as they are all repeated parts, we were able to generate a single toolpath and simply create a grid pattern of a repeating toolpath. This is a great way to optimize toolpath times; any minute saved on a single part translates into much more machine time being saved in the end. We were able to use Fusion360’s adaptive toolpaths to get very clean results right off the machine, eliminating the need for sanding down any surface (aside from removing the tabs that held the parts to the sheet during the machining process). We used an HDU foam for this project as it holds up well during machining, is durable, and is able to come off the machine with no further surface prep work required.

Painting
We wanted something that would stand out, yet still fit with our existing office décor. We also wanted to avoid any time-consuming processes for this project – sometimes less is more! After some trials, discussions, changes of minds, and more trials and discussions, we eventually went with our first plan – a combination of matte black and rust. The black pieces took up the majority of the design, and we made a smaller number of rusty pieces that would help break out the design and tie in the other rusty décor we have in our hipster space. A little bit of silver dry-brushing to add some highlights to the dark surfaces made a huge difference, and really accentuates the hard angles in the design, which really helped the overall aesthetic.
Mounting the wall art
This was something we considered right from the design process, and working with CAD software allows us to do that using a graphical interface. Drawing out the space and including it in the design gave us the opportunity to ensure the scaling was correct, and that the entirety of the assembly would fit well and as intended. Using the CAD design, we were also able to generate a locating jig that proved very useful for the placement of the floating bits, ensuring everything was hung concentrically (What a strong word, wow!).
We used cleats for mounting, but as the HDU material can tend to be brittle and screwing into the pieces ran a good chance of damaging them, we milled out the profile of the design sections into a sheet of MDF and glued the individual pieces to the backer board. We also included cutouts in the backer to reduce the weight and used the router to machine in the cleats instead of attaching separate cleat pieces.

After placing the jig, we located and mounted the cleats, and then it was just a simple process of placing the art pieces on the wall. The overall effect is exactly what we were hoping for, and is another great example of how the FROG3D system can bring your ideas into reality. Our combination of integrated systems and software is your tool for your next epic project, and our staff has the hands-on experience we are excited to share with your team. Call us yesterday!